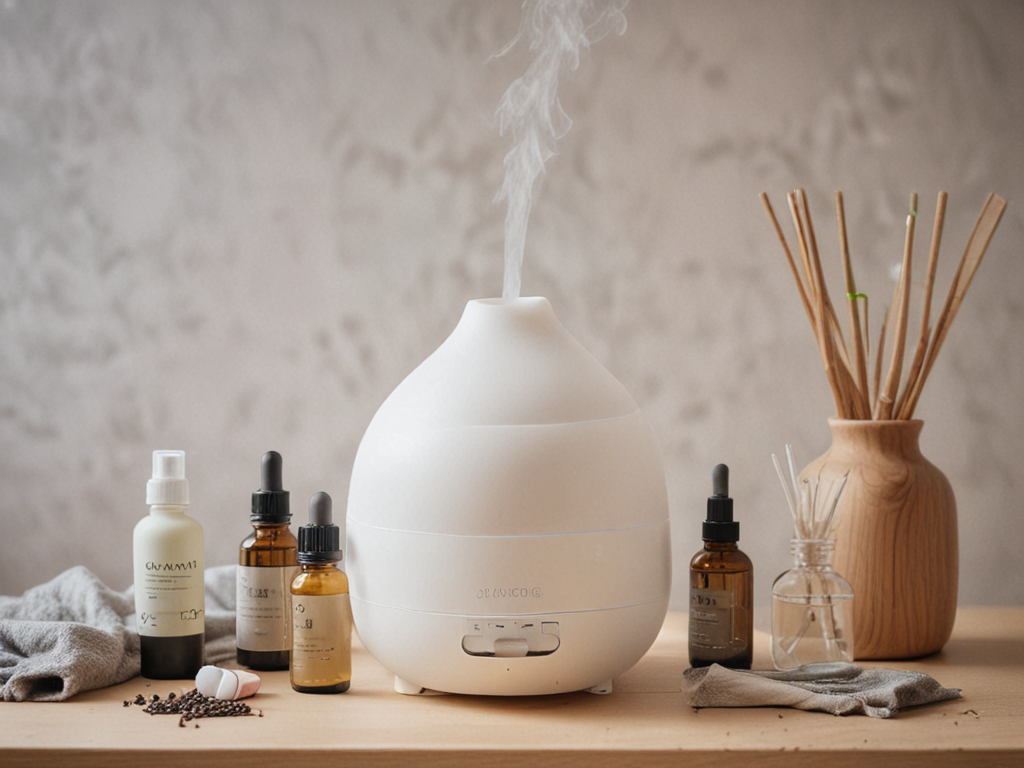
As I was enjoying the gentle scent wafting through my home from the essential oil diffuser, I realized it was time for a thorough cleaning. Ever wondered how to maintain your diffuser for best performance? Understanding the importance of regular cleaning and following a few simple steps can make sure your diffuser remains in top condition. Let’s explore the essential tips and tricks that will help you keep your essential oil diffuser running smoothly and your space filled with delightful fragrances.
Importance of Cleaning Your Diffuser
Regular cleaning of your essential oil diffuser is important to guarantee its top performance and longevity. By implementing proper preventative measures and maintenance procedures, you can ascertain that your diffuser functions efficiently and lasts for an extended period. Neglecting regular cleaning can lead to a buildup of residue, affecting the diffusion of essential oils and potentially damaging the internal components of the device.
Cleaning techniques play a vital role in preserving your diffuser’s lifespan. Residue from essential oils can accumulate over time, clogging the ultrasonic plate or nebulizer, which may hinder the diffusion process. By regularly cleaning the water tank, ultrasonic plate, and nozzle of your diffuser, you can prevent blockages and maintain the best functionality. Additionally, cleaning the diffuser helps to eliminate any germs or mold that may develop in the moist environment, ensuring that your essential oil blends remain pure and uncontaminated.
Incorporating a routine cleaning schedule into your maintenance practices is essential for the overall care of your essential oil diffuser. By following proper cleaning techniques and conducting regular maintenance, you can prolong the lifespan of your diffuser and continue to enjoy the benefits of aromatherapy without any disruptions. Remember, a well-maintained diffuser not only enhances the aromatic experience but also ensures that your device operates at its best capacity.
Gather Necessary Supplies
To prepare for cleaning your essential oil diffuser, gather the necessary supplies required for the maintenance task. Ensuring you have all the essential items at hand will make the cleaning process more efficient and effective. Here are the items you will need:
- White vinegar: Vinegar is a natural and effective cleaner that helps to break down oil residue and disinfect the diffuser.
- Water: You will need water to rinse out the diffuser and dilute the vinegar solution for cleaning.
- Soft cleaning cloth: A soft cloth will be needed to wipe down the diffuser components without scratching or damaging them.
- Q-tips or small brushes: These tools are useful for reaching small crevices and corners that are harder to clean with a cloth.
Having these supplies on hand will ensure that you can clean your diffuser thoroughly, maintaining its performance and extending its lifespan. Proper maintenance is essential for keeping your essential oil diffuser in good working condition and maximizing the aromatherapy benefits it provides. In the next section, we will explore the process of unplugging and disassembling the diffuser to prepare it for cleaning and maintenance.
Unplug and Disassemble the Diffuser
After gathering the necessary supplies for cleaning your essential oil diffuser, the next step is to unplug and disassemble the diffuser. This process is important to guarantee a thorough cleaning and maintenance routine for your diffuser. Properly disassembling the diffuser allows you to access all the nooks and crannies where residue may accumulate, affecting its performance and longevity.
To assist you further, here are some troubleshooting tips and proper storage suggestions to keep your diffuser in top condition:
| Troubleshooting Tips | Proper Storage |
|---|---|
| If the diffuser is not misting, check the water level and make sure the power source is connected. | When storing the diffuser, make sure it is in a cool, dry place away from direct sunlight. |
| In case of weak aroma diffusion, clean the ultrasonic plate with a cotton swab dipped in vinegar. | Keep the diffuser in its original box or a protective case when not in use to prevent dust accumulation. |
| Should you notice leaks, inspect the seals and O-rings for any damage and replace if necessary. | Avoid storing essential oils near the diffuser to prevent accidental spills or leaks. |
| For any unusual noises, make sure the diffuser is placed on a flat, stable surface to reduce vibrations. | Label your essential oils and store them upright to prevent leakage and ensure easy identification. |
Clean the Water Reservoir
When cleaning the essential oil diffuser, the first step is to carefully clean the water reservoir to guarantee peak performance and longevity of the device. Here are some essential tips to make sure your water reservoir is spotless and ready for use:
- Empty the Reservoir: Before starting the cleaning process, make sure to unplug the diffuser and empty any remaining water from the reservoir. This step is important to avoid any electrical mishaps during cleaning.
- Use Mild Detergent: To deep clean the water reservoir, mix warm water with a few drops of mild detergent. Gently scrub the reservoir with a soft-bristled brush to remove any residue or buildup effectively.
- Rinse Thoroughly: After scrubbing the reservoir, rinse it thoroughly with clean water to make certain no detergent or grime is left behind. This step is essential to prevent any unwanted odors or tastes during the next use.
- Dry Completely: To prevent mold growth, make sure the water reservoir is completely dry before refilling it. Use a clean, dry cloth to wipe the inside of the reservoir and let it air dry upside down for a few hours.
Wipe Down the Exterior
When maintaining my essential oil diffuser, I make sure to use gentle cleaning agents that won’t damage the exterior. It’s important to check for any residue buildup on the surface to guarantee proper functioning. Incorporating wiping down the exterior into a regular maintenance routine helps keep the diffuser clean and in good working condition.
Use Gentle Cleaning Agents
For a thorough cleaning of your essential oil diffuser, consider employing gentle cleaning agents to wipe down the exterior surface. When it comes to maintaining the cleanliness of your diffuser, using eco-friendly solutions and natural oil cleansers can be effective. Here are some tips to help you keep your diffuser looking fresh and clean:
- Eco-friendly solutions: Opt for mild cleaning agents that are gentle on the diffuser’s exterior.
- Natural oil cleansers: Use natural oils like lemon or tea tree oil to wipe down the surfaces for a invigorating scent.
- Maintenance hacks: Regularly wipe the exterior with a damp cloth to prevent dust buildup.
- Avoid harsh chemicals: Stay away from abrasive cleaners that can damage the diffuser’s surface.
Check for Residue Buildup
To guarantee the top performance of your essential oil diffuser, carefully inspect the exterior for any residue buildup and promptly wipe it down. Preventing residue buildup is essential for maintaining the efficiency of your diffuser. A simple wipe with a soft, damp cloth can prevent grime accumulation and secure the longevity of your device. However, for more stubborn residue, deep cleaning techniques may be necessary. When faced with tough buildup, a mixture of mild soap and water can be used to gently scrub the exterior. Always remember to dry the diffuser thoroughly before using it again to avoid any potential damage. Regularly checking for residue buildup and addressing it promptly can enhance the overall performance and lifespan of your essential oil diffuser.
Regular Maintenance Routine
Regularly inspect the exterior of your essential oil diffuser for any residue buildup to guarantee peak performance. To make sure your diffuser remains in top condition, follow these simple steps:
- Gently wipe down the exterior with a soft cloth dampened with water and mild soap.
- Pay special attention to crevices where oil residue may collect.
- Dry the exterior thoroughly to prevent water damage.
- Use a microfiber cloth for a streak-free finish.
Taking care of the exterior not only maintains the diffuser’s appearance but also assures its longevity. By incorporating this step into your regular maintenance routine, you can continue enjoying the essential oil benefits and aromatherapy benefits your diffuser provides.
Use Vinegar for Deep Cleaning
Consider incorporating vinegar into your essential oil diffuser cleaning routine for a thorough deep clean. Vinegar, a natural and effective cleaning agent, can help eliminate stubborn residue and bacteria that may accumulate in your diffuser over time. When using vinegar for deep cleaning, it is important to dilute it with water to prevent any damage to the diffuser components. One alternative to vinegar is using citric acid, which also offers powerful cleaning properties.
To begin the deep cleaning process with vinegar, start by unplugging your diffuser and emptying any remaining water and oil. Fill the water reservoir halfway with a mixture of water and vinegar – a ratio of one part vinegar to three parts water is typically recommended. Let the solution sit in the reservoir for about an hour to loosen any buildup or residue. After soaking, use a small brush or cotton swab dipped in vinegar to clean the nooks and crannies of the diffuser, ensuring a thorough cleanse.
Once you have scrubbed all the areas thoroughly, rinse the reservoir with clean water to remove any remaining vinegar. To eliminate the vinegar smell before using your diffuser again, you can run a cycle with just water to freshen it up. This deep cleaning technique with vinegar should be done periodically to maintain your diffuser’s performance and prolong its lifespan.
Clean the Nebulizer
When upholding your essential oil diffuser, guaranteeing the cleanliness of the nebulizer is paramount for peak performance. Proper nebulizer maintenance not only prolongs the life of your diffuser but also ensures that your essential oils are dispersed effectively. Here are some essential steps to clean the nebulizer effectively:
- Regular Cleaning: Wipe the nebulizer with a soft cloth after every use to prevent oil buildup and blockages that can affect its performance over time.
- Deep Cleaning: Periodically soak the nebulizer in a mixture of warm water and vinegar to break down any stubborn oil residue that may have accumulated.
- Inspect for Clogs: Check the nebulizer for any clogs or blockages that could impede the flow of essential oils. Use a small brush or cotton swab to carefully remove any obstructions.
- Diffuser Troubleshooting: If you notice a decrease in mist output or irregular diffusion patterns, troubleshoot the diffuser by examining the nebulizer first. Proper maintenance can often solve common issues without the need for professional intervention.
Remove and Clean the Ceramic Disc
To guarantee peak functionality of your essential oil diffuser, it is vital to properly remove and clean the ceramic disc regularly. The ceramic disc is a vital component responsible for creating the fine mist that carries the aromatic benefits of your essential oils into the air. Neglecting its care can lead to issues with diffuser performance, requiring troubleshooting and potential repairs.
Before beginning the cleaning process, make sure the diffuser is unplugged and completely cooled down. To access the ceramic disc, carefully disassemble the diffuser according to the manufacturer’s instructions. Once you have located the disc, gently remove it from its place using a soft cloth to avoid damaging this delicate part.
To clean the ceramic disc, dampen a cotton swab or cloth with isopropyl alcohol and gently wipe away any residue or buildup. Be cautious not to use excessive force as this can cause damage. Once cleaned, allow the disc to air dry completely before reassembling your diffuser.
Regular maintenance of the ceramic disc is vital for optimal diffuser performance. By incorporating this care routine into your overall diffuser maintenance, you can ensure a long lifespan for your device and enjoy the full benefits of aromatherapy without interruptions.
Clean the Diffuser’s Lid
Cleaning the diffuser’s lid is an essential step to maintain the overall cleanliness and functionality of your essential oil diffuser. Proper lid maintenance is vital in preventing mold growth and making sure that your diffuser continues to work effectively. Here are some tips to help you clean your diffuser’s lid easily and efficiently:
- Regular Wiping: Use a soft, damp cloth to wipe the exterior and interior of the lid regularly to prevent any buildup of dust or oil residue. This simple step can go a long way in maintaining the cleanliness of your diffuser.
- Soaking Method: If you notice stubborn stains or oil buildup on the lid, consider soaking it in warm, soapy water for a few hours. This will help loosen the grime, making it easier to clean with a gentle scrubbing motion.
- Avoid Harsh Chemicals: When cleaning the lid, refrain from using harsh chemicals or abrasive cleaners as they can damage the delicate components of the diffuser. Opt for mild dish soap or vinegar for a safe and effective cleaning solution.
- Drying Thoroughly: After cleaning the lid, make sure it is completely dry before reattaching it to the diffuser. Moisture left on the lid can promote mold growth, so take the time to dry it thoroughly to maintain a hygienic environment.
Clean the Diffuser’s Fan
Maintaining the cleanliness and functionality of your essential oil diffuser also involves ensuring that the diffuser’s fan is kept clean and free of dust or debris. Fan maintenance is vital for best performance and to prevent potential issues with your diffuser. To clean the fan, begin by unplugging the diffuser and allowing it to cool down if it has been in use. Once cooled, gently remove the fan cover if your diffuser has one.
Next, using a soft-bristled brush or a can of compressed air, carefully remove any dust or debris that may have accumulated on the fan blades or inside the fan compartment. Be gentle to avoid damaging the fan blades. If the fan cover is removable, you can also clean it separately with a mild detergent and water, making sure it is completely dry before reattaching it.
Regular dust removal from the fan can help maintain the efficiency of your diffuser and prevent any blockages that may affect its performance. By incorporating fan maintenance into your routine cleaning schedule, you can make sure that your essential oil diffuser continues to disperse fragrant aromas effectively.
Reassemble Your Diffuser
Once all the components have been thoroughly cleaned and dried, carefully reassemble your essential oil diffuser following the manufacturer’s instructions to guarantee proper functionality.
Here are some essential tips to reassemble your diffuser properly:
- Align the Components: Make sure all the parts are correctly aligned before attempting to put them back together. Improper alignment can lead to leaks or malfunction.
- Handle with Care: When reassembling, handle the delicate components, such as the ceramic or glass parts, with care to avoid breakage or damage that could affect the diffuser’s performance.
- Secure the Seals: Check and make certain that all seals, particularly around the water reservoir and the essential oil compartment, are properly seated and secure. Loose seals can lead to leaks during operation.
- Test for Functionality: Before adding water and essential oils, give the diffuser a quick once-over to ensure everything looks correct. This step can help prevent potential issues and save you from having to disassemble the unit again.
Troubleshooting tips:
- If you encounter any difficulties during reassembly, refer back to the manufacturer’s instructions for guidance.
- Double-check that all parts are clean and dry before putting them back together to prevent mold or bacterial growth.
- If the diffuser is still not functioning correctly after reassembly, reach out to the manufacturer’s customer service for further assistance.
Perform a Test Run
After completing the reassembly process, it is crucial to conduct a test run of your essential oil diffuser to make sure proper functionality before regular use. To test the effectiveness of the diffuser, fill the water reservoir to the recommended level and add a few drops of your favorite essential oil. Make sure that the diffuser is placed on a stable surface and is plugged into a power source. Turn the diffuser on and observe the mist output.
During the test run, pay close attention to the mist production. It should be steady and consistent, filling the room with the aroma of the essential oil. If you notice any irregularities such as weak mist output or no mist at all, there may be issues with the diffuser that need troubleshooting.
To troubleshoot issues, first, check the water level to make sure it is adequate. If the water level is fine, try cleaning the diffuser again following the steps outlined in the previous sections. Sometimes, residue buildup can hinder the diffuser’s performance.
After troubleshooting, run another test to see if the issues have been resolved. If the diffuser is now working correctly, you can proceed to regular use with confidence. Conducting a test run not only ensures the effectiveness of your essential oil diffuser but also helps in identifying and resolving any potential issues before they become more significant problems.
Regular Maintenance Tips
To keep your essential oil diffuser running smoothly, it’s important to adhere to a regular maintenance schedule. Cleaning your diffuser frequency will depend on how often you use it, but a general recommendation is at least once a week. All you need to perform these maintenance tasks are simple tools like water, white vinegar, and cotton swabs.
Cleaning Frequency
Regular maintenance of your essential oil diffuser is important to guarantee peak performance and longevity of the device. Here are some tips on cleaning frequency to keep your diffuser in top condition:
- Daily Wipe Down: Use a damp cloth to wipe the inside of the diffuser daily to prevent oil residue buildup.
- Weekly Rinse: Give your diffuser a thorough rinse with water once a week to remove any lingering oils.
- Monthly Deep Clean: Perform a deep clean using vinegar or alcohol to disinfect and remove stubborn residue.
- Regular Checkups: Inspect your diffuser regularly for any signs of mold or bacteria growth and address them promptly.
Tools Needed
For effective regular maintenance of your essential oil diffuser, gather the necessary tools to guarantee thorough cleaning and peak performance. Here are the essential tools you will need:
| Tools | Quantity | Purpose |
|---|---|---|
| White Vinegar | 1 bottle | Effective for deep cleaning |
| Soft Cleaning Cloth | 2 | Gentle wiping of diffuser components |
| Cotton Swabs | 10 | Detail cleaning of small parts |
To guarantee your diffuser remains in top condition, utilize these tools along with proper cleaning techniques and maintenance tips. White vinegar helps remove stubborn residue, a soft cloth prevents scratches, and cotton swabs aid in detailed cleaning. By incorporating these tools into your regular maintenance routine, you can prolong the life of your essential oil diffuser and enjoy its benefits for longer.
Final Thoughts and Tips
To summarize, it is essential to remember to clean your essential oil diffuser regularly to maintain its efficiency and prolong its lifespan. Neglecting proper cleaning can lead to the buildup of residue, affecting the diffusion of essential oils and potentially damaging the device over time. Here are some final thoughts and tips to help you make the most of your essential oil diffuser:
- Consistent Cleaning Schedule: Set a regular cleaning routine to prevent residue buildup and guarantee peak performance of your diffuser. A weekly or bi-weekly cleaning schedule is ideal to maintain a clean and efficient device.
- Use Distilled Water: Opt for distilled water instead of tap water to minimize mineral buildup inside the diffuser. This simple switch can prolong the lifespan of your diffuser and improve its overall performance.
- Experiment with Essential Oil Blends: Explore different essential oil blends to enjoy a variety of aromatherapy benefits. Mixing oils not only creates unique scents but also enhances the therapeutic effects of aromatherapy.
- Seek Professional Help for Troubleshooting: If you encounter persistent issues with your diffuser despite regular maintenance, consider consulting a professional for troubleshooting techniques. They can offer tailored solutions to address specific problems and make sure your diffuser functions optimally.
Conclusion
As I carefully cleaned my essential oil diffuser, I couldn’t help but think of how each wipe and rinse was like a purifying ritual for my soul. Just as I remove impurities from the diffuser, I am also removing negativity from my life. It’s a reminder that cleaning isn’t just about physical cleanliness, but also about mental clarity and emotional well-being. Embrace the process, and let the invigorating scent of clean diffuser bring peace to your space.


